TÉCNICA
How to make pizza in a kamado: stone, temperature and dough
The definitive guide to baking pizza in a kamado: deflector and stone setup, preheating, dome temperature versus stone temperature, launching with a peel and the dough that survives the heat.
Quick answer
To make pizza in a kamado, set the deflector with a baking stone on top and stabilise the dome at 350-400°C, a kamado's real ceiling. Preheat the stone for 30-40 minutes so the base won't burn. Launch the pizza with a peel and bake it for 4-7 minutes, turning it halfway through.
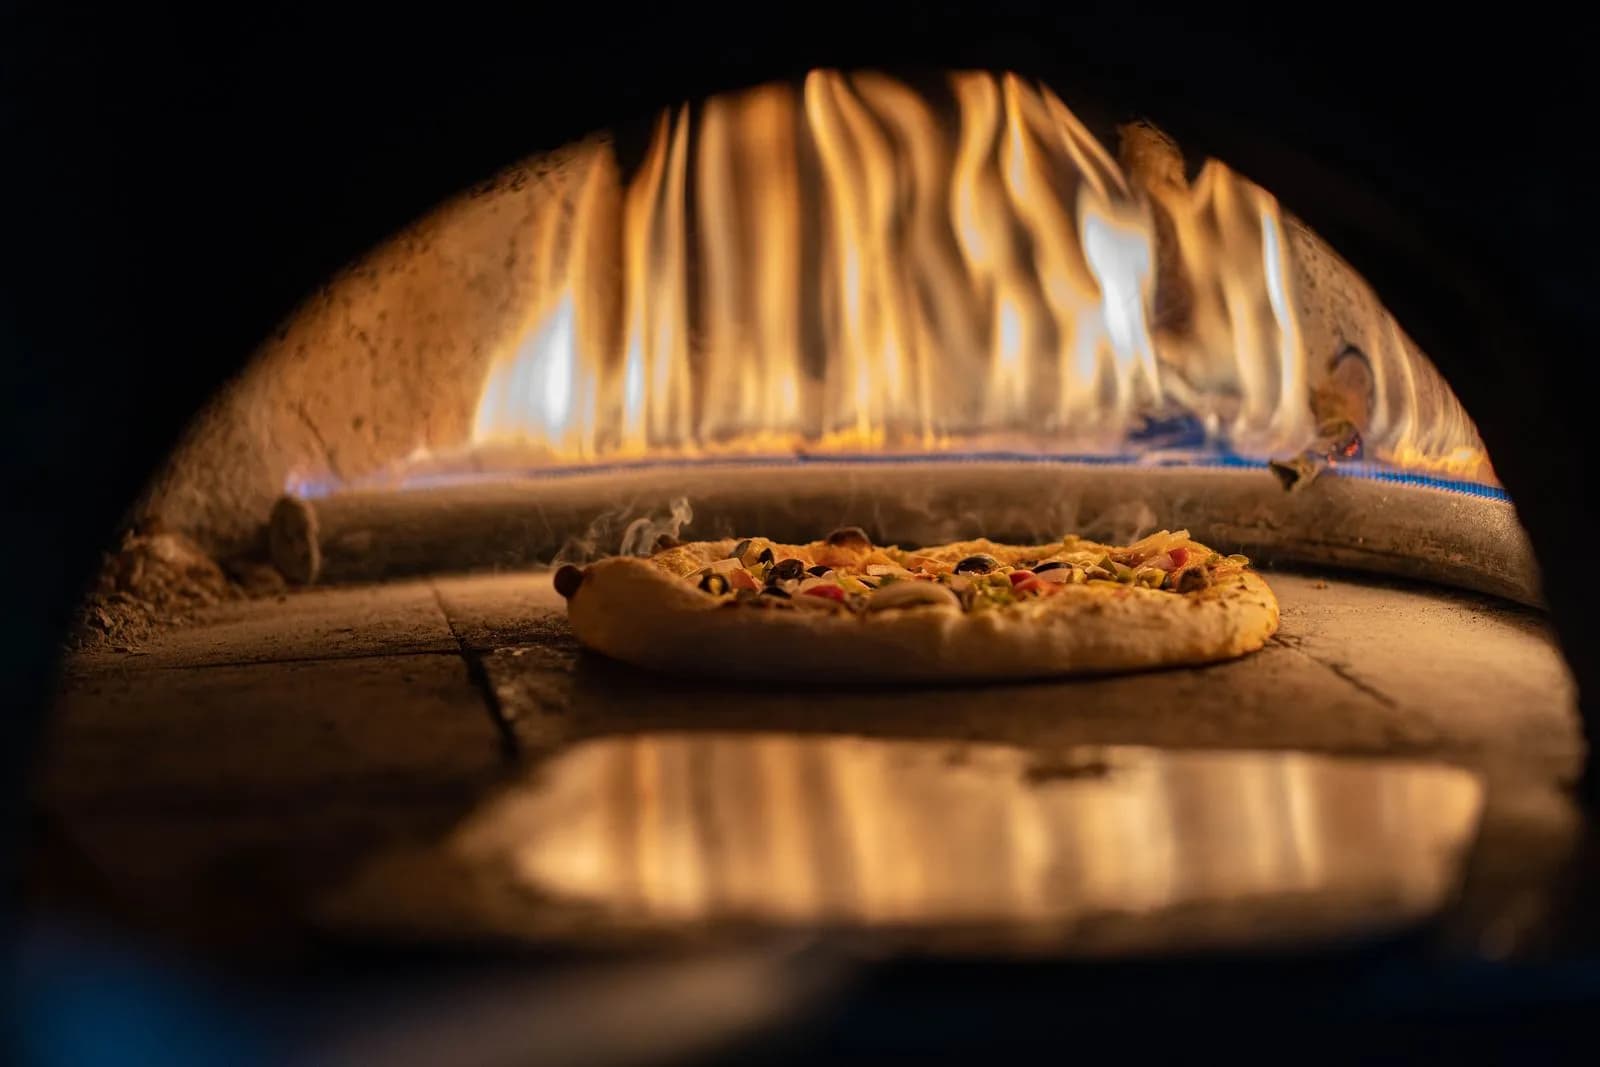
A kamado makes a cracking pizza, but you have to understand what it is and isn't. It's not a Neapolitan oven: an Ooni or a wood-fired oven runs past 450°C and bakes a Neapolitan in 60-90 seconds; a ceramic kamado, honestly, tops out at 350-400°C. The good news is that this ceiling is plenty for an excellent pizza —a puffed crust, a crisp base, melted cheese that doesn't scorch— provided you set the gear up properly and give the stone the preheat time it needs.
This is the hub page for our pizza recipes, from the Neapolitan and the margherita to the Roman al taglio and the calzone. Here is the technique they all share: deflector plus stone, the difference between dome temperature and stone temperature, how to launch and turn with the peel, and the hydration and cold ferment of a dough that takes the kamado's heat without burning underneath.
| Style | Dome temp. | Stone temp. | Time | Hydration |
|---|---|---|---|---|
| Neapolitan | 380-400°C (the ceiling) | 350-380°C | 5-7 min | 62-65% |
| Roman al taglio | 300-330°C | 280-300°C | 12-18 min | 75-80% |
| American barbecue | 260-300°C | 240-270°C | 10-14 min | 60-63% |
| Everyday / medium (margherita, diavola) | 320-360°C | 300-340°C | 7-10 min | 62-65% |
A kamado isn't a Neapolitan oven: honest temperatures
Let's start with what causes the most confusion, because it shapes everything else. Authentic Neapolitan pizza bakes in a wood-fired oven at 430-480°C in 60-90 seconds: that brutal heat puffs the cornicione and gives it the charred spotting (the *leoparding*) before the base dries out. A ceramic kamado, however good, tops out at 350-400°C in the dome with the lid closed. It's physics: the ceramic and the vents won't give more without forcing the gear, and anyone promising you 500°C in a kamado is either exaggerating or baking with the lid off, which is something else entirely.
We're honest about this because we also sell dedicated pizza ovens: if your only goal is competition-grade Neapolitan, an Ooni or a wood-fired oven is the right tool, not the kamado. But that isn't most people's question. Most people own a kamado, use it to smoke and roast, and want to make great pizzas at the weekend without buying a second appliance. And for that, 380°C is more than enough.
The trick is to match expectations and style to the real temperature. At 380°C you're not chasing the 70-second Neapolitan; you're after a 4-7 minute pizza with a crisp crust, an airy crumb and a handsome golden colour. It's actually easier to nail than extreme Neapolitan, because you have margin: a few extra seconds won't scorch it instantly. The kamado also brings something a kitchen oven can't —a faint background of wood smoke— that genuinely adds to an American barbecue or a roasted-vegetable pizza.
The setup: deflector, stone and why they go in that order
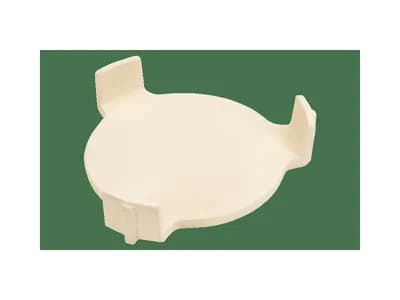
To make pizza you need indirect heat —if the base of the pizza sees the live coals directly, it carbonises in seconds while the top stays raw. You get there with the deflector (the conveGGtor in a Big Green Egg, plate setter or half-moon stone in other brands), which blocks the coals' direct radiation and turns the kamado into a convection oven. Without a deflector there is no pizza worth the name: there's a disc burnt black underneath.
On top of the deflector goes the baking stone (cordierite is ideal for its thermal-shock resistance) or a steel plate. The order matters and so does the gap: deflector first, then some spacers or the grate itself, and the stone on top. Set the stone flush against the deflector with no air gap and it takes too much conducted heat and burns the base; raise it to the height of the main grate and it sits closer to the dome and bakes more evenly. In practice, the stone at grate height or slightly above is the position that best balances dome and base.
Stone or steel? Cordierite stone stores plenty of heat and releases it gradually: it's more forgiving, gives the classic crisp base and is the most versatile place to start. Steel conducts heat faster and more aggressively, ideal if you want more push on the base at medium temperatures, but it punishes mistakes: with steel very hot you scorch the base sooner. For most people, a good 38 cm cordierite stone is the right buy. Whichever you choose, the principle doesn't change: the stone bakes the base, the dome bakes the top, and your job is to bring both to point at the same time.
Preheating the stone: the step almost everyone skips
Here is the number-one mistake in kamado pizza, and the cause of 90% of pale —or worse, burnt— bases: not giving the stone the preheat time it needs. The kamado's chamber reaches 380°C in 15-20 minutes, but the stone is solid and takes far longer to saturate with heat. Launch the pizza when the air reads 380°C but the stone is cold inside and the base stays pale and gummy while the top is already done.
The rule is simple: once the chamber is stable at temperature, let the stone preheat for 30-40 minutes before the first pizza. It's not optional and it's not overkill: a cordierite stone a couple of centimetres thick needs that time to heat through to its core. The reliable way to check is not the dome thermometer —which measures the dome's air, not the stone— but an infrared thermometer pointed at the stone's surface. When it reads between 330 and 380°C depending on the style, it's ready.
One important nuance for batches of several pizzas: the stone loses heat every time you launch a cold pizza onto it and every time you open the lid. That's why the second pizza is sometimes better than the first (the stone is now perfectly saturated) but the fourth or fifth can come out pale if you don't let it recover. Between pizzas, close the lid for 3-5 minutes so the stone and dome return to where they should be. If you're baking many in a row, nudge the target temperature up a notch for margin.
Dome vs stone: the two temperatures you have to square
This is the idea that separates a passable pizza from a brilliant one. In a kamado two distinct temperatures coexist and you govern them separately. The dome temperature (roughly what the lid thermometer reads) bakes the top: it melts the cheese, browns the rim, raises blisters. The stone temperature bakes the base by conduction. If the two aren't in step, the pizza fails: burnt base and unmelted cheese, or pale base and scorched rim.
You raise the dome with the coals and the vents: more lit charcoal and wider vents, more air temperature. You raise the stone with preheat time, and lower it a touch by raising it if you want less conduction. The golden trick when the base is burning but the top is lagging: lower the stone temperature (more rest time between pizzas, or raise the stone to move it away from the deflector) and raise the dome by opening the vents, so the rim browns sooner. And vice versa: if the rim burns but the base comes out pale, you need more stone and less dome.
As an honest reference for a kamado: for a medium 4-7 minute pizza, aim for dome at 350-400°C and stone at 330-380°C, with the stone a few degrees below the dome so the cheese bubbles just as the base crisps. For thicker styles like Roman al taglio, drop everything to 300-330°C and stretch the bake to 12-18 minutes: a tall dough at 400°C burns outside before the inside cooks. The table above sums up the range for each style. If you want to go deeper on governing the kamado by its vents, the temperature-control guide covers it.
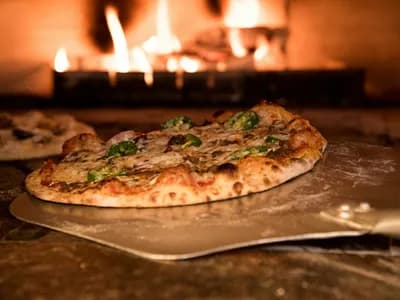
Launching and turning with the peel without wrecking the pizza
The stone is ready and the dough is stretched: now you have to get the pizza inside without it sticking to the peel or sliding off. The move is called the launch, and you learn it in two or three goes. The prep that matters most is the flour or semolina under the dough: build the stretched pizza on a well-floured peel using durum-wheat semolina (it slides better than fine flour and scorches less), check the dough slides with a little shake of the peel before you add the sauce, and work fast: the longer raw dough sits on the peel, the more it dampens and sticks.
To launch: rest the tip of the peel on the edge of the stone at about a 20° angle, and with one sharp pull back, draw the peel away while the pizza stays on the stone. It's a decisive yank, not a hesitant shove. A thin aluminium or wooden peel helps enormously here; the perforated peel also drops the excess flour and keeps the base clean. If the pizza crumples on launch, it's almost always because the dough was too thin or had sat on the peel too long.
Once inside, turning is mandatory. In a kamado the heat is never perfectly even: the zone nearest the dome and the vent opening browns first. At 2-3 minutes, once the base has set and the pizza slides, give it a half-turn (180°) with the peel —or with a smaller, round turning peel if you're baking many— to even out the browning. A pizza left unturned in a kamado comes out with one side perfect and the opposite one pale. Turn it once, wait for the rim to brown evenly and pull it: 4-7 minutes in total for a medium pizza.
The dough that takes the kamado: hydration and cold ferment
The baking technique is half of it; the dough is the other half, and it's where a kamado pizza goes from fine to memorable. For a kamado's 350-400°C, the reference hydration is 62-65% (grams of water per 100 of flour): enough for an airy crumb and a rim that puffs, without tipping into a dough so wet it's ungovernable on the peel. For a Roman al taglio in a tray you go up to 75-80%, because you don't launch it with a peel and you want big holes; for a thin, crisp everyday base, 60-63% is plenty.
The flour matters as much as the water. Use a strong flour, "00" type or W300-340, with enough protein to develop the gluten that survives the stretch and the heat. And the secret that changes the result most: a cold ferment of 24 to 72 hours in the fridge. That long, cold fermentation develops flavour, makes the dough more digestible and, above all, gives it the strength and extensibility to stretch thin without tearing and to puff up sharply in the kamado's heat. A 2-hour room-temperature dough will never taste or behave like a 48-hour cold one.
Two final details that make a difference. First, take the dough out of the fridge 1-2 hours before baking and let it come to temperature: a cold ball stretches badly and bakes unevenly on the hot stone. Second, stretch by hand, never with a rolling pin: the pin crushes the gas that gives the puffed rim and leaves you a flat, tough pizza. To see it applied step by step, our sourdough pizza on the peel recipe takes this dough to its most artisanal version, and the Neapolitan explains the classic Neapolitan balling and stretch.
Making pizza in a kamado is, at heart, managing two temperatures at once: the dome, which bakes the top face and melts the cheese, and the stone, which bakes the base. You set the deflector with the stone on top, stabilise the chamber at 350-400°C, give the stone a 30-40 minute preheat and bake in 4-7 minutes, turning halfway. That's 90% of the result.
And the honest part bears repeating: a kamado is not a 480°C Neapolitan oven, so don't expect perfect leoparding in 70 seconds. But at 380°C, with a properly hot stone and a 65% hydration dough cold-fermented for 24-72 hours, out comes a pizza that anyone will devour. Once you've got the base technique down, open any of our recipes —Neapolitan, diavola, sourdough on the peel— and you'll see they all hang on these same four moves.
Gear featured in this guide


Recipes to get started

Neapolitan pizza on the kamado
At 350°C the base puffs in 90 seconds and the cornicione comes out leopard-spotted and pillowy. One pizza, three minutes, zero margin for error.

Margherita pizza on the kamado
Tomato, fior di latte and basil: three ingredients and nowhere to hide. On a 350°C stone the cornicione puffs in seconds and the margherita reminds you why it is still the queen.
Sourdough pala-style pizza on the kamado
A Roman pala-style pizza — long, with a tall, open-crumb edge — leavened with sourdough and baked on steel at 350°C with the deflector in.

Roman pizza al taglio on the kamado
High-hydration dough fermented 48 hours, baked in a pan and scissor-cut into rectangles like in Rome's forni. Crisp below, an open-crumbed cloud within.

Diavola pizza on the kamado
Spicy salami curling and bleeding its red oil over the mozzarella, and a thread of hot honey to finish. The diavola is pure balance of fire, fat and sweetness.
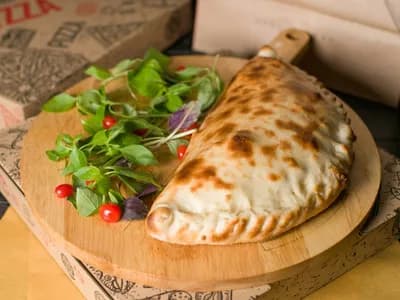
Classic calzone on the kamado
A sealed pizza is a promise: outside, a golden crackling dome; inside, ricotta, mozzarella and ham steamed molten by their own crust. The kamado nails both halves.
GO DEEPER
Continue with these
- Related guide
What charcoal to use in a kamado (and which to avoid)
Quebracho or holm-oak lump wins; supermarket briquettes and chemical lighter fluid stay out. Here is what to load and why.
- Related guide
Kamado Temperature Control: The Pitmaster's Guide
The dual airflow system, the rookie mistake of overshooting, and why the dome thermometer lies. This is the skill that separates a beginner from a pitmaster.
- Related guide
5 essential accessories to get started with your kamado
Heat deflector, probe, lighter, cover and cast iron: what truly earns its price on day one, and what is just hot air.
- Recipe to practice
Neapolitan pizza on the kamado
At 350°C the base puffs in 90 seconds and the cornicione comes out leopard-spotted and pillowy. One pizza, three minutes, zero margin for error.
- Recipe to practice
Margherita pizza on the kamado
Tomato, fior di latte and basil: three ingredients and nowhere to hide. On a 350°C stone the cornicione puffs in seconds and the margherita reminds you why it is still the queen.
- Recipe to practice
Sourdough pala-style pizza on the kamado
A Roman pala-style pizza — long, with a tall, open-crumb edge — leavened with sourdough and baked on steel at 350°C with the deflector in.
- Editorial comparison
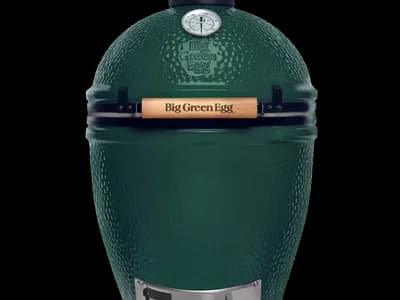
big green egg large vs kamado joe classic iii
The classic kamado matchup: the Big Green Egg Large, the indestructible pioneer with the widest accessory network, again
- Glossary term
Heat deflector
Ceramic plate placed between the coals and the grate to turn direct fire into indirect cooking.
- Glossary term
Plate setter
Big Green Egg's name for its three-legged ceramic deflector, equivalent to the modern ConvEGGtor.
- Glossary term
ConvEGGtor
Big Green Egg's current name for its ceramic heat deflector; successor to the plate setter, turning the EGG into a convection oven.
Frequently asked questions
What temperature do you make pizza at in a kamado?
In the dome, between 350 and 400°C, which is the realistic ceiling of a ceramic kamado with the lid closed. The stone, measured with an infrared thermometer, wants to sit between 330 and 380°C depending on the style, a few degrees below the dome so the cheese bubbles just as the base crisps. At 380°C a medium pizza takes 4-7 minutes. Don't expect the 480°C of a Neapolitan oven: the kamado won't reach it, and forcing it only wastes charcoal. For thicker styles like Roman al taglio, drop to 300-330°C and stretch the bake out.
Stone or steel for pizza in a kamado?
To start, cordierite stone. It stores plenty of heat and releases it gradually, forgives timing errors more readily and gives the classic crisp base; it's the most versatile option and the one we recommend by default. Steel conducts heat faster and more aggressively, pushes the base harder at medium temperatures and is excellent for someone who already has the technique, but it punishes carelessness: with steel very hot you scorch the base before you notice. Whichever you pick, it goes on the deflector with an air gap, never against the coals. A good 38 cm stone covers 95% of cases.
Why is the base of my pizza burning?
Almost always one of three reasons. One, the stone too hot relative to the dome: lower its temperature by raising it a little to move it away from the deflector, or let it rest longer between pizzas, and raise the dome by opening the vents to compensate. Two, the stone flush against the deflector with no air gap, which heats it by brutal conduction; always leave a separation. Three, too much fine flour under the dough, which carbonises: use durum-wheat semolina, which holds up better and slides cleaner. If the base burns but the top lags, the problem is always the stone-dome imbalance: less stone, more dome.
Do I need a pizza oven if I have a kamado?
It depends how demanding you are about Neapolitan. For great weekend pizzas —margherita, diavola, barbecue, vegetables— the kamado is more than enough and you need nothing else: deflector, stone and technique. Where the kamado falls short is the competition-grade Neapolitan, which calls for 450-480°C and 60-90 seconds to puff the cornicione with classic leoparding; only a wood-fired oven or an Ooni delivers that. We're honest because we also sell those ovens: if extreme Neapolitan is your obsession, buy a dedicated oven. If not, the kamado you already own makes pizzas that delight anyone.
How long does the stone take to preheat?
About 30-40 minutes once the chamber is stable at temperature, not before. The chamber reaches 380°C in 15-20 minutes, but the stone is solid and takes far longer to saturate with heat right through to its core. Launch the pizza when the air already reads temperature but the stone is cold inside and the base comes out pale and gummy. Check it with an infrared thermometer pointed at the stone's surface, not with the lid thermometer, which measures the dome's air. And remember that every cold pizza and every lid opening steals heat: let it recover 3-5 minutes between pizzas.
What hydration should the dough have for the kamado?
For a kamado's 350-400°C, 62-65% hydration is the reference point: an airy crumb, a rim that puffs and a dough still governable on the peel. For a Roman al taglio in a tray go up to 75-80%, because you don't launch it with a peel and you want big holes; for a thin, crisp everyday base, 60-63% is perfect. Even more important than the exact figure is the cold ferment of 24-72 hours in the fridge and a strong flour, "00" type or W300-340: that combination gives flavour, digestibility and the strength needed to stretch thin and to puff up sharply in the heat.