Recipe · Direct · Advanced
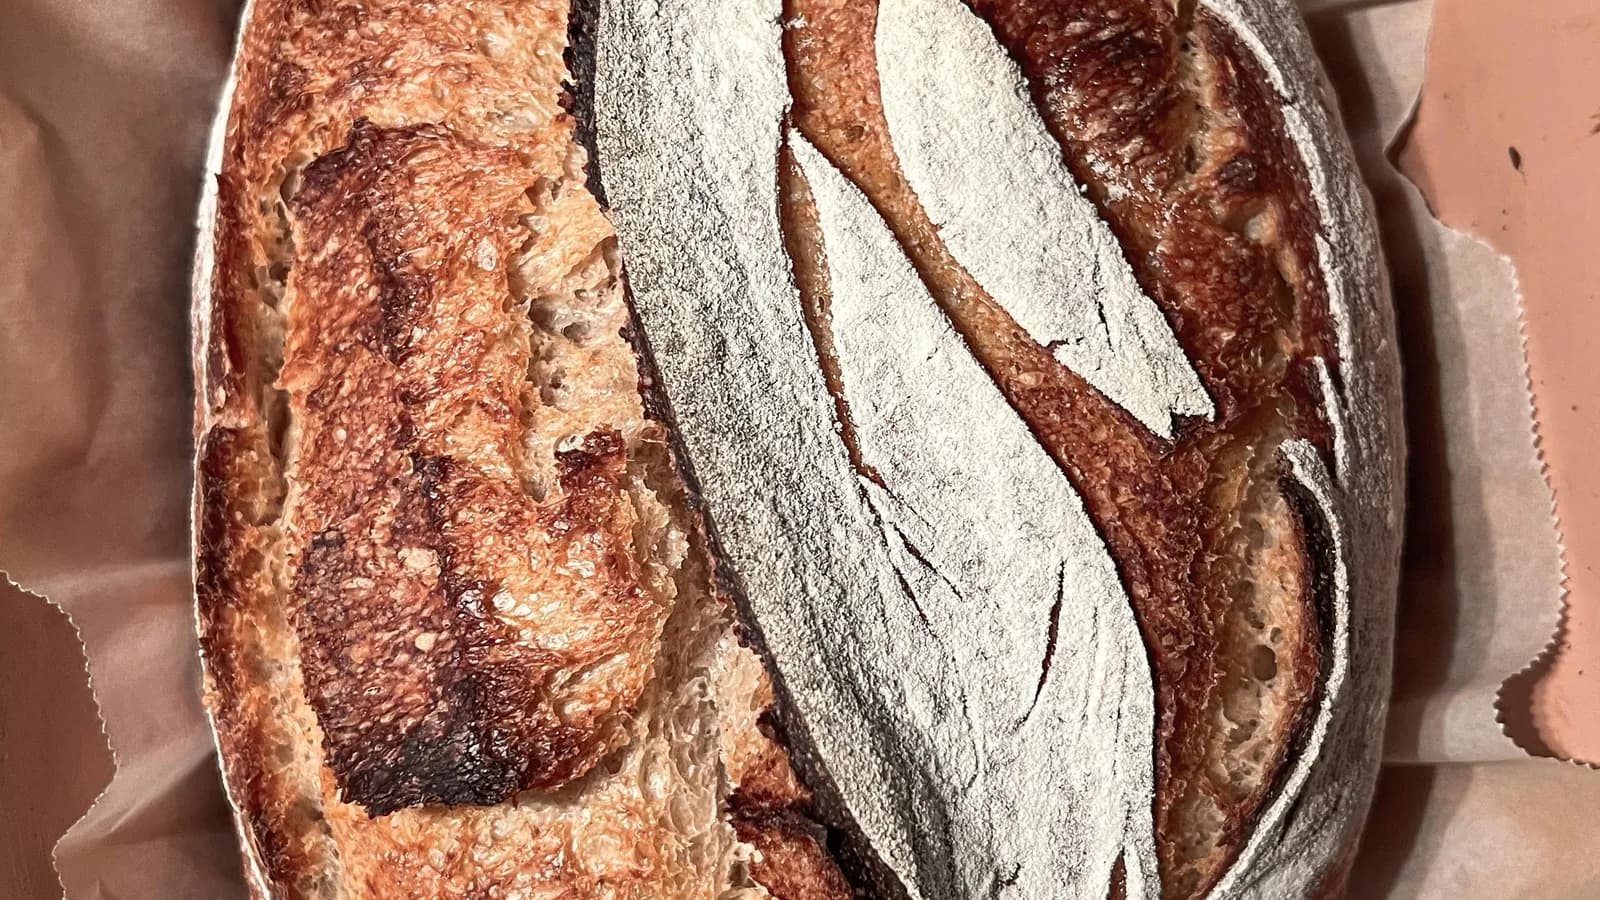
Rustic sourdough loaf in a dutch oven on the kamado
The definitive loaf: 24 hours of fermentation with active starter, cold retard in a banneton and a dutch oven that turns the kamado into a pro bakery oven.
Season:All year
Quick answer
Sourdough in a Dutch oven on the kamado ferments for about 24 hours with an active starter and a 12-hour cold retard. Bake it in a pot preheated for 45 minutes at 230 °C: 25 minutes lidded and 25 minutes uncovered at 210 °C. Cracker crust and an open crumb; cool for an hour before slicing.
One big step at a time, screen kept on and built-in timers.
- Prep
- 1440 min
- Cook
- 50 min
- Servings
- 8 servings
- Temperature
- 230 °C
What time do you want to eat?
Pick a time and we'll tell you when to start.
12:40
the day before
Start the prep
12:40
Light the kamado
13:00
Onto the kamado
14:00
Serve
Estimate: it includes lighting and settling the kamado plus a margin for large cuts. If the recipe asks you to marinate or salt ahead, add that time.
Fire setupIndirect
- Dome
- 230 °C
- Deflector
- Yes
- Fuel
- Plenty of lump charcoal
- Setup
- Deflector and cast-iron dutch oven
Temperature curve
3:15 h from lighting
Kamado dome
| # | From | Phase | Dome |
|---|---|---|---|
| 1 | 0:00 | Light the charcoalDeflector and plenty of charcoal, dutch oven inside, lid on | 20 → 230 °C |
| 2 | 0:38 | StabiliseDutch oven inside with the lid on, 45 min minimum at 230 °C | 230 °C |
| 3 | 1:23 | Put the food in45° score, dough into the covered pot | 230 → 205 °C |
| 4 | 1:25 | Bake25 min with the dutch oven lid on | 205 → 230 °C |
| 5 | 1:50 | BakeLid off the pot, at 210 °C, until dark crust | 230 → 210 °C |
| 6 | 2:15 | RestCool 1 hour on a rack before slicing | 210 → 60 °C |
| 7 | 3:15 | Serve | off |
0:00 is the moment you light the charcoal. Internal temperatures are the ones the recipe gives; without a probe, go by the times. Turn these times into clock times with the planner
For this recipe
Ingredients
- bread flour (W240-260)425 g
- whole-wheat flour (15% of total)75 g
- filtered water (~28°C)350 ml
- fine sea salt10 g
- active sourdough starter (fed 8-12 h prior)100 g
- rice flour (for the banneton)20 g
Allergens
- Gluten
Based on the recipe's ingredients. Always check the label of every product you buy.
The gear for this recipe
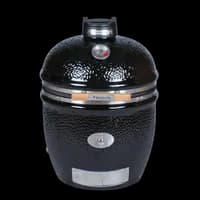 Monolith Classic Pro 2.0
 Jealous Devil 100% White Quebracho lump charcoal 15.8 kgQuebracho lump with a clean, steady burn to hold 230 °C with no unwanted flavours.
 Petromax FT9 Cast Iron Fire Pot (Dutch Oven)Cast-iron Dutch oven that traps the steam from the dough for a crisp crust.
 Kesper 19631: 25 cm rattan banneton with removable cloth liner
Method
- 01
Feed the starter
The night before, feed the starter at 1:5:5 (10 g starter + 50 g flour + 50 g water). Leave 8-12 hours at 22-24°C. It is ready when it doubles and floats in water.
- 02
Autolyse
Combine both flours with 330 ml of the water (reserve 20 ml for later). Mix only until no dry patches remain. Cover and rest 1 hour at room temperature.
- 03
Add starter and salt
Add the starter on top and pinch it through. Dissolve the salt in the reserved 20 ml of water and pour over the dough. Pinch and fold for 2-3 minutes until integrated.
- 04
Stretch & fold (4 cycles)
Every 30 minutes for 2 hours, wet your hand, grab one side of the dough, stretch it up and fold it over the centre. Rotate the bowl 90° and repeat three times. Total: 4 cycles.
- 05
Bulk ferment
After the fourth fold, let the dough rest another 1-2 hours until it grows by 50% and looks airy. Ambient temperature decides: in summer one hour is enough.
- 06
Shape
Tip the dough onto a lightly floured counter. Pre-shape into a ball, rest 20 minutes, then do the final boule or batard shape building tension on the surface.
- 07
Cold retard 12h
Place the dough seam-side up in a banneton well dusted with rice flour. Bag it loosely and fridge for 12 hours (8 min, 18 max).
- 08
Preheat dutch oven
With deflector and plenty of charcoal, place the closed dutch oven in the kamado and climb to 230°C. Hold for at least 45 minutes so the pot is fully hot.
- 09
Score and load
Pull the dutch oven, flip the dough onto parchment (seam-side now down). Score deep at 45° with a razor. Lower bread and paper into the pot. Cover.
- 10
Bake
Close the kamado and bake 25 minutes covered at 230°C. Remove the dutch oven lid, drop to 210°C and finish 25 minutes until the crust is dark. Pull and cool on a rack for at least 1 hour.
About this recipe
A rustic sourdough in a dutch oven bakes 25 minutes covered at 230°C then 25 minutes uncovered at 210°C inside the kamado. The covered pot traps the dough's own steam and recreates pro-oven conditions: cracker crust, open crumb, gently tangy flavour. It is the most demanding recipe in the rotation and the one that rewards patience most.
Starter and autolyse
It all starts with a starter fed 12 hours earlier, at peak activity — it floats in water if you test it. No active starter, no rise, so this step is not optional. Then comes a 1-hour autolyse: only flour (bread flour + 15% whole wheat) and water. That hour develops gluten without kneading and improves extensibility.
Next add the starter and salt and begin stretch & fold: 4 cycles every 30 minutes. Each cycle is visible — the dough goes from sticky to silky, from flat to domed.
Cold retard and scoring
The dough moves to the banneton (dusted with rice flour, which does not stick) and into the fridge for 12 hours of cold retard. This develops flavour and firms the surface, making clean scoring possible. Scoring (45° razor cuts on the surface) directs the expansion: skip it and the loaf bursts at its weakest side.
The dutch oven inside the kamado
A Lodge dutch oven (or equivalent) preheated 45 minutes at 230°C inside the kamado mimics a wood-fired oven. The first 25 covered minutes trap the dough's steam and build the crust. The next 25 uncovered at 210°C brown and dry the loaf. Result: cracker crust, open crumb, a loaf that sings while it cools.
In 30 seconds: active starter 12h, 1h autolyse, 4 stretch&fold every 30 min, 12h cold retard, 45° scoring, dutch oven preheated 45 min at 230°C, 25 min covered + 25 min uncovered at 210°C, cool at least 1 hour before slicing.
Will it fit your kamado?
Small
33-40 cm · Joe Jr, MiniMax
Tight
A ~30 cm dutch oven is a tight fit; check the height with lid under the dome.
Medium
46-51 cm · Classic, Large
Fits
The dutch oven fits easily on the grate.
Large
56-61 cm · Big Joe, XL
Fits
Fits with room to spare; perhaps two pots to bake two loaves.
What to serve with it
- Beer
- Saison or wheat beer
- Alcohol-free
- Plain kombucha
Leftovers and storage
- In the fridge
- Not in the fridge: 1-2 days at room temperature, cut side down, wrapped in a cloth.
- Freezing
- Freezes very well sliced for 2-3 months; toast straight from frozen.
- Reheating
- Spritz the crust with water and give it 8-10 min in the oven or kamado at 200 °C.
- Using them up
- Pan con tomate, migas or torrijas with day-old bread.
Cool and refrigerate within 2 hours. When in doubt, throw it out.
Leftover embers
You still have embers: what to do with the leftover heat
For 50 min at 230 °C in a classic kamado you load about 1 kg of charcoal and burn 800 g: when you serve, about 170 g of live embers remain. Before you shut the vents, that is still enough for:
Closing the vents halfway and waiting for it to drop
140-200 °Cdessert while you eat
20 minof embers
- Smoked Loaded Nachos on the Kamado12 min · 185 °C
- Kamado-roasted figs with goat cheese and honey7 min · 200 °C
No recipe needed
- Yesterday's bread with oil and garlic, on the grate (10 min)
Before opening the lid, crack it open for a few seconds first; if you raise the heat, stir the ash so the coals can breathe. And if you are not going to use them: once the food is out, close the bottom and top vents. The charcoal that does not burn (about 170 g) can be used next time. Different size of kamado? Work out your load for 1 h 30 min of fire, lighting included.
No kamado?
How to make it without a kamado: oven, gas grill or pellets
This loaf bakes inside a Dutch oven at 230 °C, and the pot does most of the work. A home oven gives the same result; it is its natural home.
Home oven
- Temp.
- 230 °C conventional, 210 °C once uncovered
- Time
- 50 min, same as on the kamado
- Preheat the lidded pot for 45-60 min in the oven, on the lower-third rack
- Fan off: forced air dries the crust before the loaf has finished rising
- A tray on the bottom rack stops the base burning in ovens with a strong bottom element
SmokeBarkJuicinessSame as the kamado: the pot does the work
Gas grill
- Temp.
- 230 °C on the outer burners with the centre one off
- Time
- 50 min, same as on the kamado
- Set the pot over the unlit zone: with a flame right underneath, the base burns
- Put a stone or a tray under the pot to spread the bottom heat
- Trust a thermometer next to the pot, not the lid gauge, which reads high
SmokeBarkJuicinessWorks well if you protect the base; slightly less even
Pellet grill or electric smoker
- Temp.
- 230 °C then 210 °C on a pellet grill; an electric smoker cannot get there
- Time
- 50 min, same as on the kamado
- Preheat the pot for 45 min: the grill takes longer than a kamado to heat the iron through
- The 25 uncovered minutes pick up a light smoky aroma: use mild fruitwood pellets
SmokeBarkJuicinessVery similar, with a hint of smoke on the crust
Temperatures and times are a guide; the original recipe is the kamado one. Tempted? which kamado to choose for what you cook
Editor's tips
- Test your starter with the float test: a teaspoon in a glass of water. Floats = ready. Sinks = wait longer.
- In the banneton, rice flour does not stick to the cloth or the dough. Regular wheat flour absorbs moisture and the dough sticks — classic beginner mistake.
- Scoring is confidence: one quick, deep cut at 45°. Hesitate and the razor snags, tearing the dough.
- The dutch oven needs at least 45 minutes at 230°C. Without that thermal mass, the first 5 critical minutes for oven spring are lost.
- Cool at least 1 hour on a rack before slicing. Cut it hot and the crumb collapses, going gummy. This step is not optional.
Gear for this recipe
As an Amazon Associate, mikamado.es earns from qualifying purchases. At no extra cost to you.

Monolith Classic Pro 2.0
€2,000

Jealous Devil 100% White Quebracho lump charcoal 15.8 kg
Quebracho lump with a clean, steady burn to hold 230 °C with no unwanted flavours.
€206
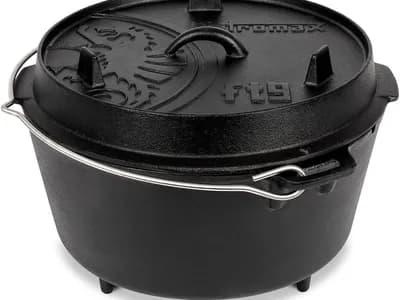
Petromax FT9 Cast Iron Fire Pot (Dutch Oven)
Cast-iron Dutch oven that traps the steam from the dough for a crisp crust.
€113
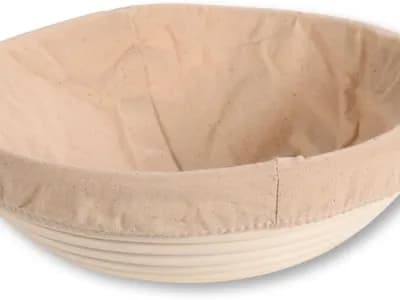
Kesper 19631: 25 cm rattan banneton with removable cloth liner
€19
Have you made it?
Tell us how it turned out on your kamado. We review every rating before publishing it.
No published ratings yet. Be the first!
FAQ
How long does it take to build a sourdough starter from scratch?
7 to 14 days. Mix 50 g whole-wheat flour with 50 g water, cover with a cloth and wait 24 hours, discard half and feed 50+50 again. Repeat daily. Bubbles appear from day 5; reliable doubling from day 10.
Which dutch oven should I buy for the kamado?
The Lodge L8DOL3 (4.7 L, bare cast iron) is the canonical pick: handles brutal heat and has a metal handle. Any similar 24-26 cm cast-iron dutch oven works as long as it has NO plastic knob and NO thin enamel — both fail at 230°C.
Can I make it without sourdough, with commercial yeast?
Yes. Replace the 100 g starter with 7 g fresh yeast and reduce water to 320 ml. The flavour loses its trademark tang and the crumb tightens slightly, but the dutch oven method still produces a spectacular crust.
Can I swap the whole-wheat flour for another flour?
Yes. Rye flour at the same 15% gives more flavour and more tang. Whole spelt works equally well. I would avoid raising whole-grain content above 15%, as the crumb tightens and the loaf gets heavy.
How do I store the bread after baking?
Day one, wrapped in a cotton cloth on the counter. From day two, slice and freeze in a zip bag. To revive, drop frozen slices straight into the toaster — they snap back to crisp in 90 seconds.
Can you bake sourdough in a Dutch oven without a kamado?
Yes, and the home oven is its natural home: 230 °C lidded and 210 °C uncovered, 50 minutes in all. A gas grill or pellet grill works too if you shield the base from direct heat.
What do I do with the embers left after making Rustic sourdough loaf in a dutch oven on the kamado?
After 50 min at 230 °C in a classic kamado about 170 g of live embers remain: 20 min at 140-200 °C closing the vents. If you are not going to use them, close both vents and keep the charcoal for next time.
More kamado recipes


KEEP READING
Go deeper on this dish
- Recommended kamado
Monolith Classic Pro 2.0
The German alternative to the Kamado Joe Classic III
- Editorial guide
How to light a kamado: the step-by-step method
No petrol, no weird tablets and no 45-minute waits. The cone method, airflow control and the mistakes that prevent 80% of the frustration.
- Glossary term
Heat deflector
Ceramic plate placed between the coals and the grate to turn direct fire into indirect cooking.
- Related comparison
kamado joe classic iii vs monolith classic pro 2 cart
The comparison every European cook eventually makes: the Kamado Joe Classic III, the US reference with SlōRoller, again…